-
由
 虚拟的现实创建于10月 13, 2023
需要 3 分钟阅读时间
虚拟的现实创建于10月 13, 2023
需要 3 分钟阅读时间
ESXi 主机升级
SCVM集群单节点关机
迁移虚拟机
将要升级的esxi上的所有虚拟机迁移到其他节点
检查集群
使用ssh远程工具登录需要关机ESXI节点上的SCVM(用户密码线下保存有)
检查是否存在待恢复数据块
zbs-meta pextent find need_recover


检查是否存在损坏数据块
zbs-meta pextent find dead

检查节点状态是否正常
zbs-meta chunk list

注意:检查所有节点正常在线并且没有数据在恢复和没有数据块损坏后才可以进行下面的操作
若如截图所示,则证明节点正常。截图中的IP为节点的存储私网IP,可使用命令”ip -4 a”获取当前SCVM节点的存储IP。确认对应的SCVM后进行以下操作
SCVM进入维护模式
经过以上步骤检查无异后,输入以下命令配置待关机节点进入维护模式。命令中的cid表示将要设置存储维护模式的chunk id,可通过步骤1.2.3截图输出中的第一列“ID”字段获取。如10.0.10.103节点的cid为1,并且当前SCVM节点的存储IP为10.0.10.103,则输入以下命令对当前SCVM设置维护模式:
zbs-meta chunk set_maintenance 1 true
注意事项:如果设置了维护模式,就相当于这段维护时间该节点上的数据不会触发数据恢复,集群会有部分数据处于单副本模式,如果这段时间其它节点故障下线或者其它节点有硬盘故障,则可能会导致部分数据丢失。
SCVM关机
待关机的节点成功进入维护模式后,登录对应的SCVM执行以下命令对SCVM进行关机。
shutdown -h now
esxi进入维护模式
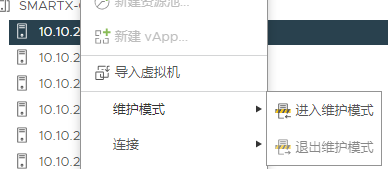
右键esxi主机--维护模式--进入维护模式
升级esxi
esxcli software profile update -p DEL-ESXi-703_21686933-A12 -d /vmfs/volumes/WS-SMTX-Stor-3C/iso/VMware-VMvisor-Installer-7.0.0.update03-21686933.x86_64-Dell_Customized-A12.zip
==================================================================================================================================
如果esxi忘记进入维护模式执行了升级命令

重启完esxi后,这个时候不要做其他动作,SCVM其实已经开机启动了。按第5步检查SCVM集群和第6步等待数据恢复完成后。重启下vCenter再在esxi右键重新连接下应该就正常了
==================================================================================================================================
esxi重启
右键esxi主机--电源--重新引导

esxi退出维护模式
右键esxi主机–维护模式–退出维护模式,然后SCVM会自动开机启动
检查SCVM集群
使用ssh远程工具登录任一节点操作系统后台,输入以下命令确认所有节点状态正常,若如截图所示,则证明节点正常
zbs-meta chunk list

SCVM退出维护模式
zbs-meta chunk set_maintenance 1 false
等待数据恢复
统计批量数据恢复,显示数字为1的时候完成数据恢复
zbs-meta pextent find need_recover | wc -l
检查是否存在损坏数据块
zbs-meta pextent find dead
总结
- SCVM进入维护模式–关机。
- ESXI进入维护模式--升级--重启–退出维护模式。
- SCVM-退出维护模式。
- 集群数据恢复
故障硬盘恢复操作
卸载硬盘
登录Smartx管理界面
点击下图减号卸载硬盘。提示数据迁移量,点确认进行数据迁移

数据迁移
界面查看
如下图右边转圈圈完成数据就迁移完成

命令行查看
SSH远程故障主机的SCVM的ip地址,输入下面命令
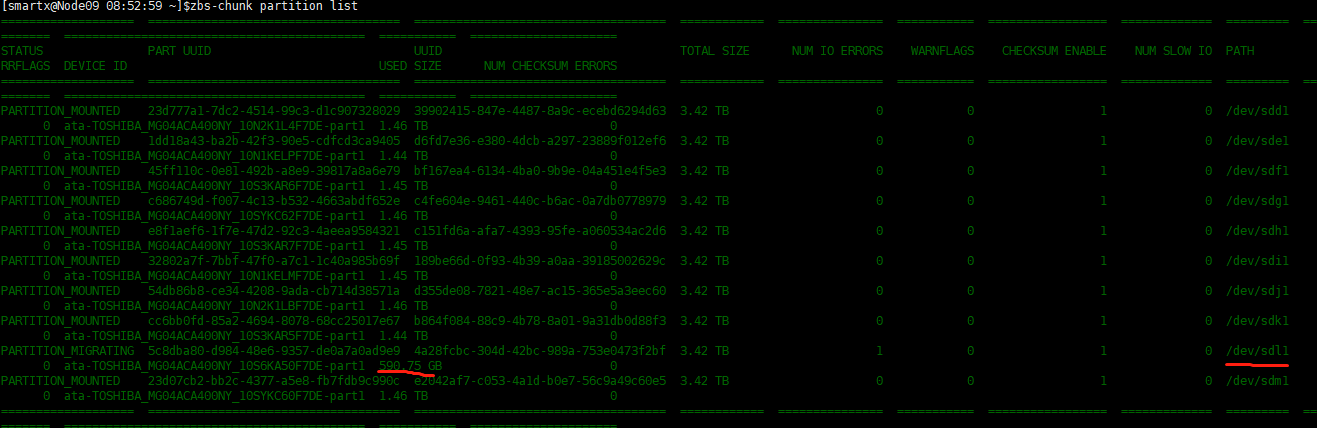
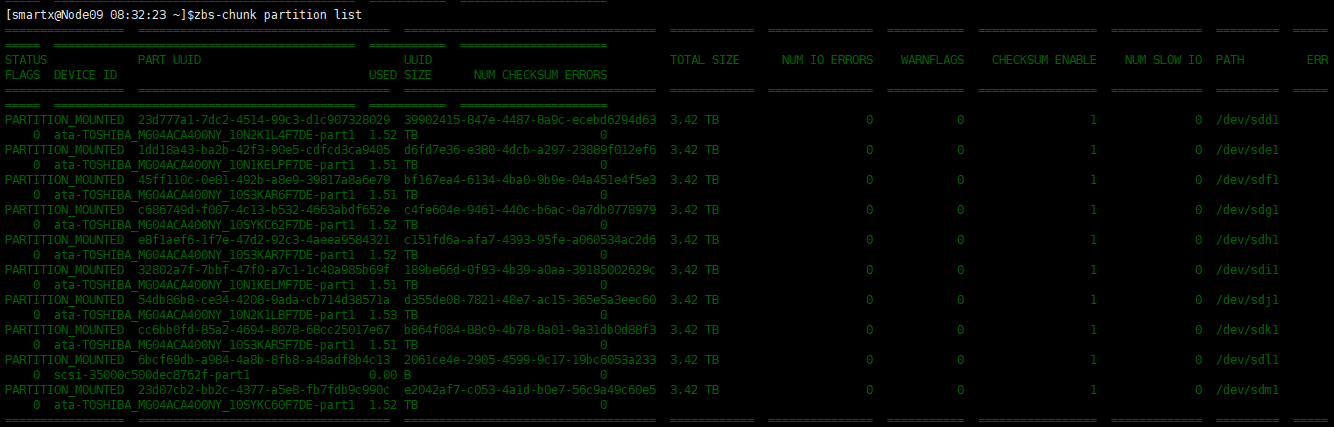
zbs-chunk partition list
直到对应硬盘的USED SIZE为0数据迁移完成
如下图还有600G左右的数据在迁移中
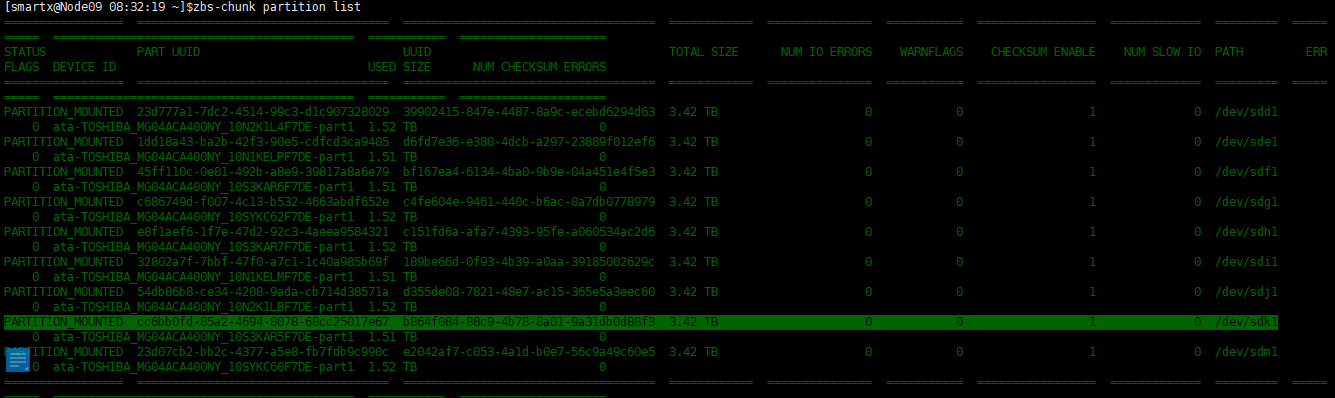
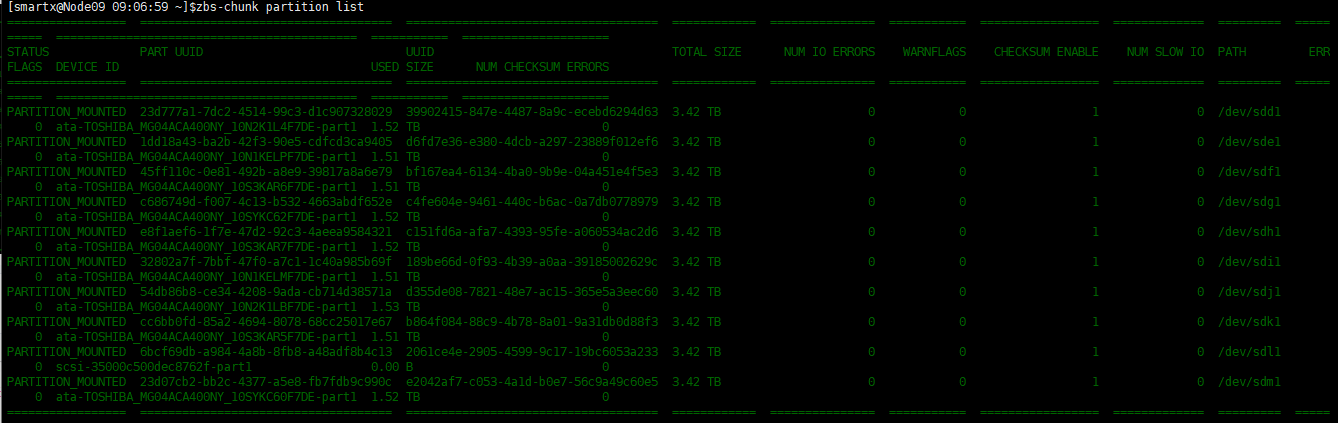
迁移完成
如下两图:界面看到未挂载,命令行显示USED SIZE字段没有数据了

挂载硬盘
点加号挂载

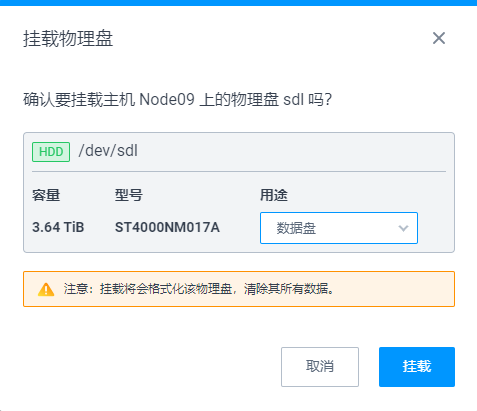
稍等几分钟,此时就是挂载硬盘不需要同步数据

挂载完成
此时新盘是没有数据的。之前迁移走的数据不需要同步,新数据会自动填充进来

注意:拔盘的时候,需要等磁盘上的数据进⾏迁移完,然后前端报警提⽰可以安全拔出磁盘
后,才能进⾏物理拔盘。
添加评论