-
创建者:
 虚拟的现实,上次更新时间:7月 01, 2025
需要 6 分钟阅读时间
虚拟的现实,上次更新时间:7月 01, 2025
需要 6 分钟阅读时间
1. 简介
随着环境中搭建的应用越来越多(seafile 云盘、seatable 在线表格、immich 图片管理、confluence 知识库、outline 在线文档等),每个应用都配置对应的用户名和密码,应用多了使用和记录以及日常的管理都非常麻烦,有没有一种应用能够将这些账号整合起来统一管理呢?这就是需要实现的单点登录。
目标:
- 配置并启用 keycloak
- 在 keycloak 中配置应用和对应的账号
- 配置 seafile 云盘应用使用 keycloak 的账号实现 sso 单点登录
Seafile 的功能和安装无需过多介绍,详细的内容可以参考以下文档:
- docker-seafile-11.06 ARM
- docker-seafile-12.0.11
- docker-seafile pro -11.0.14
- docker-seafile-12.0.6
- docker-自定义 seafile
seatable 用来提供在线表格应用,详细的配置过程可以参考以下内容:
Keycloak 提供针对现代应用程序和服务的开源身份和访问管理解决方案,支持单点登录 SSO,服务可通过 OpenID Connect、OAuth 2.0 等协议对接 Keycloak。有关 Keycloak 内容可以参考以下文档:
- docker-部署安装 keycloak
- Keycloak 使用群晖 Synology Directory Server 作为 AD/LDAP 用户数据源
- Outline 整合 KeyCloa k的 OIDC 登录
1.1. 身份认证与授权简述
| 名词 | 英文 | 说明 |
|---|---|---|
| 身份识别 | Identification | 让系统知道你是谁 |
| 身份验证 | Authentication | 让系统相信你是谁 |
| 授权 | Authorization | 允许他人存取某项资源 |
| 访问控制 | Access Control | 检验是否有资格存取某项资源 |
- 身份识别 (Identification) 要让系统知道你是谁,就必须告诉他。在我们一开使「输入账号」的时候,其实就是在做这件事情。
- 身份验证。这个部分也就是主要确定「你」是谁的活动。为了达成这个目的,需要知道除了系统外,只有你才知道的信息(或只有你才拥有的)。 最常见的辨识方式就是「密码」,此外,近来的生物识别,包含指纹辨识、Face Id、虹膜辨识等,都是在验证身份。
- 授权控制,Authorization,和身份验证的英文很像。指的是将某个权限(permission)授予给某人(或某只程序)的活动。 特别注意的是,授予对象不只限于「自然人」,还包含机器人或应用程序。是建立的 Client。
- 访问控制。Web App 在做存取资源的部分。
简单来说,这整个过程: 在决定了 某人(谁) 对于 某项资源 是否有 某种操做的权限。
在一个环形通道的一次有一扇上锁的门。我必须证明我有那门的钥匙,我只需要从一边进入,并且从另一边出来就可以。
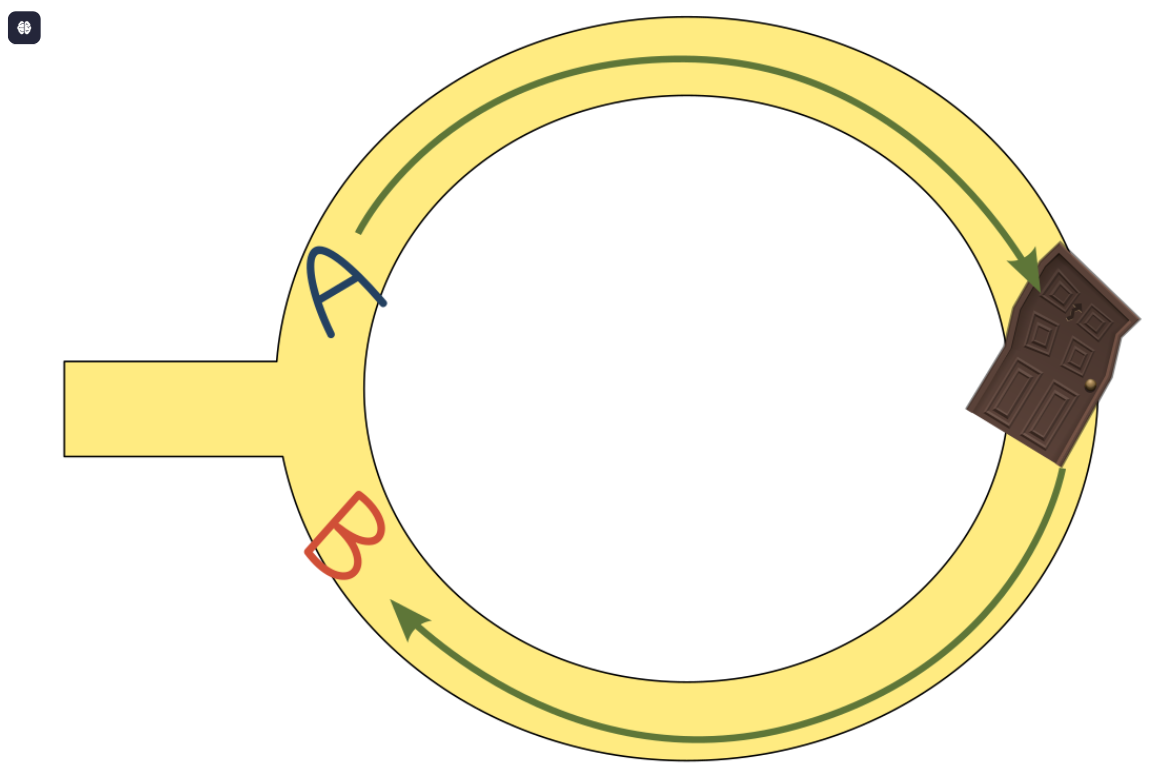
只要能够从A进入,B出来就说明我有门钥匙
1.2. 环境说明
| 项目 | 内容 |
|---|---|
| seafile | http://192.168.182.53:8003 |
| keycloak | http://192.168.182.52:8080 |
| seatable | http://192.168.11.185:8003 |
| seafile | keycloak 的 realms 和 client |
| seatable | Keycload 的 client ,共用 seafile 的 realms |
| 测试用户1 | 13600006772@139.com |
| 测试用户2 | 13600006773@139.com |
参照简介的内容完成 seafile 和 keycloak 的配置,也可以直接下载配置文件运行【keycloak 配置文件 env.keycloak和keycloak.yml】【Seafile 配置文件 seafile_12.0.yml和env.seafile】
2. keycloak 配置
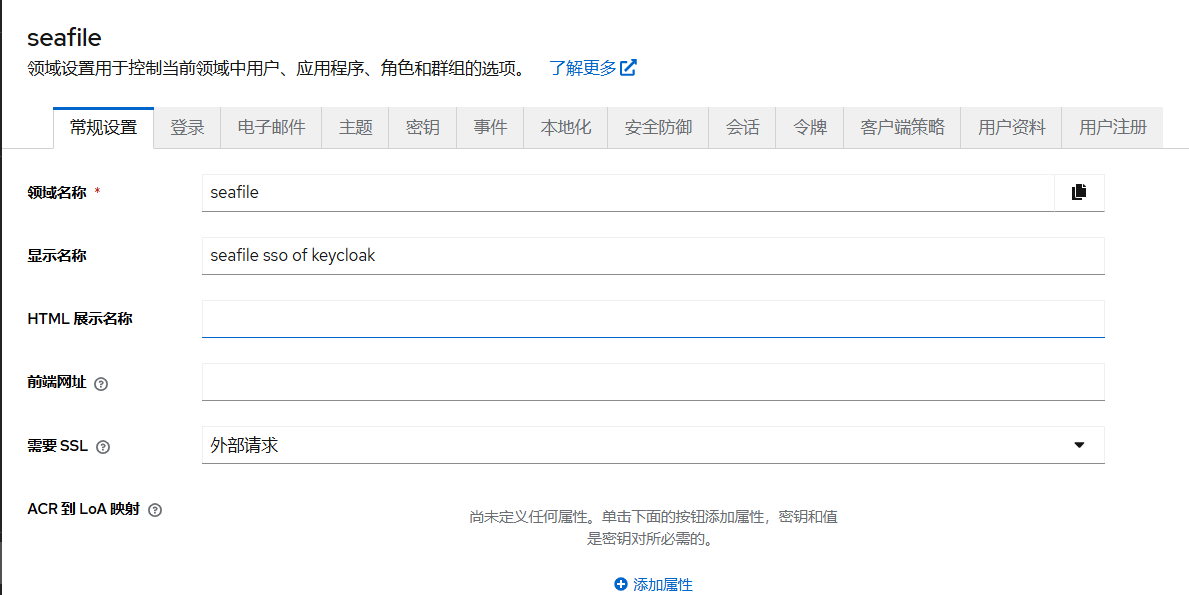
1、使用管理员 admin 登录 keycloak ,在 keycloak 中创建单独的领域 seafile ,后续的操作都基于 seafile 领域不会影响和干扰其它的应用。
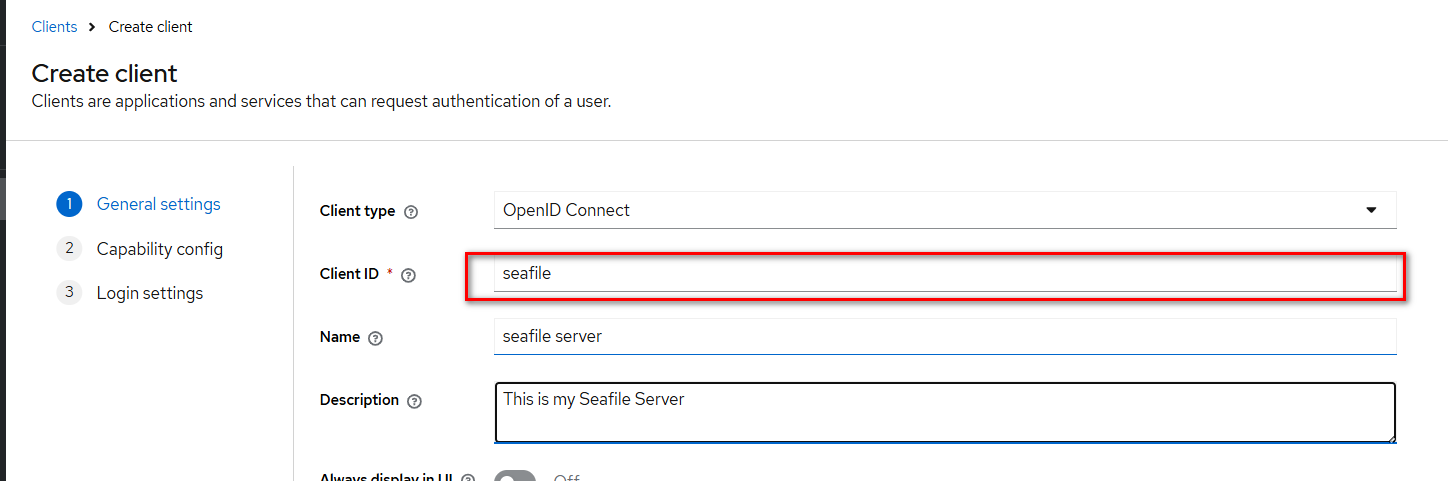
2、在 seafile 领域下创建 seafile 的客户端,参照环境和下图完成 seafile 客户端配置
- 【General Settings】-【Client ID】处填写 seafile ,【name】 和 【Description】 不是必填项,按需填写即可
- 【Capability config】确保启用 【Client authentication】并勾选 【Authentication flow】中的 Standard flow
- 进入【Access settings】后
- 【Root URL】:http://192.168.182.53:8003
- 【Home URL】:/accounts/login
- 【Valid redirect URIs】:http://192.168.182.53:8003/*
/oauth/callback/ - 【Web origins】:http://192.168.182.53:8003
- 【Admin URL】:http://192.168.182.53:8003

3、完成后可以参照下图查看设置状态
4、查看【clients】-【Credentials】


5、在 keycloak 中创建用户

3. Seafile 配置
在启用单点登录前请先确保 seafile 能正常使用,启用 sso 单点登录可以参考官网说明,具体的操作方式是在 seahub_settings.py 文件中增加 keycloak 相关的配置
##### config of keycloak ############
ENABLE_OAUTH = True
OAUTH_CREATE_UNKNOWN_USER = True
OAUTH_ENABLE_INSECURE_TRANSPORT = True
OAUTH_ACTIVATE_USER_AFTER_CREATION = True
OAUTH_CLIENT_ID = "seafile"
OAUTH_CLIENT_SECRET = "vw4S3xvmeFmb0biGmEPClCFlLoYFQ5Hw"
OAUTH_REDIRECT_URL = "http://192.168.182.53:8003/oauth/callback/"

OAUTH_PROVIDER_DOMAIN = '192.168.182.53:8003'
OAUTH_AUTHORIZATION_URL = 'http://192.168.182.52:8080/realms/seafile/protocol/openid-connect/auth'
OAUTH_TOKEN_URL = 'http://192.168.182.52:8080/realms/seafile/protocol/openid-connect/token'
OAUTH_USER_INFO_URL = 'http://192.168.182.52:8080/realms/seafile/protocol/openid-connect/userinfo'
OAUTH_SCOPE = ["openid", "profile", "email"]
OAUTH_ATTRIBUTE_MAP = {
    "sub": (True, "uid"),
    "email": (False, "contact_email"),
    "name": (False, "name")
}
##### keycloak config edn ###########
按上面的内容完成调整后重启 seafile 即可生效。
4. 测试验证单点登录功能
1、按正常方式登录 seafile ,点击登录界面的【单点登录】按钮进入单点登录
2、点击单点登录后会自动跳转到 keycloak 的登录界面
3、在 keycloak 的登录界面输入在 keycloak 中新增的用户名和密码完成登录
4、登录后就能直接使用 seafile 的各项功能


5. seatable 配置
seatable 的配置和 seafile 类似,将 seatable 整合进来是想实现注册用户仅新建一次。也就是要实现直接用 seafile 配置中新建的 keycloak 用户也能在 seatable 中登录。
5.1. 调整 seafile 领域的会话设置
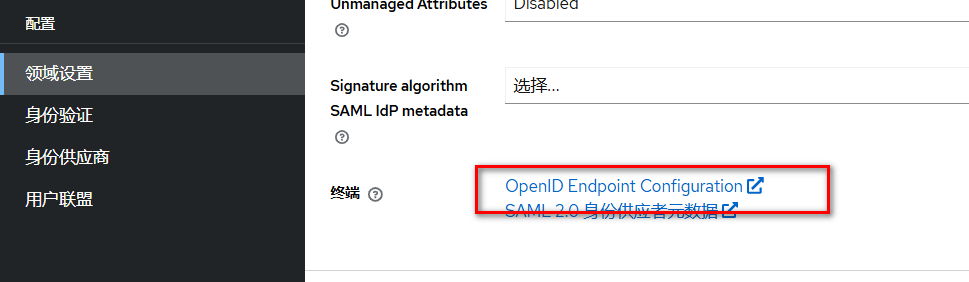
新建领域后默认的会话设置存在一个问题:当前用户退出应用后点击【单点登录】按钮不会弹出 keycloak 的登录认证界面,会直接进入对应的应用界面。为确保安全,可以通过修改领域用户的会话周期提升安全。

5.2. 新建 seatable 的 client
在 seafile 领域下创建 seatable 的客户端,参照环境和下图完成 seatable 客户端配置
【General Settings】-【Client ID】处填写 seafile ,【name】 和 【Description】 不是必填项,按需填写即可
【Capability config】确保启用 【Client authentication】并勾选 【Authentication flow】中的 Standard flow
进入【Access settings】后
【Root URL】:http://192.168.11.185:8003
【Home URL】:/accounts/login
【Valid redirect URIs】:http://192.168.182.53:8003/*
/oauth/callback/
【Web origins】:http://192.168.11.185:8003
【Admin URL】:http://192.168.11.185:8003
5.3. seatable 单点配置
seatable 启用单点配置和 seafile 内容存在差异,在启用单点登录前请先确保 seatable 能正常使用,启用 sso 单点登录可以参考官网说明,具体的操作方式是在 dtable_web_settings.py 文件中增加 keycloak 相关的配置
##### config of keycloak ############
ENABLE_OAUTH = True
OAUTH_CREATE_UNKNOWN_USER = True
OAUTH_ENABLE_INSECURE_TRANSPORT = True
OAUTH_ACTIVATE_USER_AFTER_CREATION = True
OAUTH_CLIENT_ID = "seatable"
OAUTH_CLIENT_SECRET = "TXKuFxc1ZK1eWwHMIY9K9rZ1K8e4npmN"
OAUTH_REDIRECT_URL = "http://192.168.11.185:8003/oauth/callback/"

OAUTH_PROVIDER_DOMAIN = '192.168.11.185:8003'
OAUTH_AUTHORIZATION_URL = 'http://192.168.182.52:8080/realms/seafile/protocol/openid-connect/auth'
OAUTH_TOKEN_URL = 'http://192.168.182.52:8080/realms/seafile/protocol/openid-connect/token'
OAUTH_USER_INFO_URL = 'http://192.168.182.52:8080/realms/seafile/protocol/openid-connect/userinfo'
OAUTH_SCOPE = ["openid", "profile", "email"]
OAUTH_ATTRIBUTE_MAP = {
    "sub": "uid",
    "email": "contact_email",
    "name":  "name"
}
##### keycloak config edn ###########

6. seafile 配置企业微信统一认证方案
6.1. 拓扑描述
6.2. 认证服务部署(Docker 版)
1、创建认证服务代码
新建目录 wechat-auth-service,包含以下文件:
app/main.py(FastAPI 服务核心代码):
import os
from fastapi import FastAPI, Request
from fastapi.responses import RedirectResponse
import requests
from urllib.parse import quote

app = FastAPI()

# 从环境变量读取配置
CORP_ID = os.getenv("WECHAT_CORP_ID")
AGENT_ID = os.getenv("WECHAT_AGENT_ID")  # 从环境变量读取应用AgentID
APP_SECRET = os.getenv("WECHAT_APP_SECRET")
SEAFILE_URL = os.getenv("SEAFILE_REDIRECT_URL", "https://www.xxx.xom")

@app.get("/auth_callback")
async def auth_callback(request: Request):
    code = request.query_params.get("code")
    state = request.query_params.get("state")

    if not code or state != "seafile":
        return {"error": "invalid_request"}

    # Step 1: 获取Access Token
    token_url = f"https://qyapi.weixin.qq.com/cgi-bin/gettoken?corpid={CORP_ID}&corpsecret={APP_SECRET}"
    token_res = requests.get(token_url).json()
    if token_res.get("errcode") != 0:
        return {"error": "token_failed"}

    # Step 2: 获取用户ID
    access_token = token_res["access_token"]
    user_url = f"https://qyapi.weixin.qq.com/cgi-bin/user/getuserinfo?access_token={access_token}&code={code}&agentid={AGENT_ID}"
    user_res = requests.get(user_url).json()
    if user_res.get("errcode") != 0:
        return {"error": "userinfo_failed"}

    # Step 3: 重定向并设置Cookie
    response = RedirectResponse(url=SEAFILE_URL)
    response.set_cookie(
        key="wechat_authed",
        value="1",
        max_age=8*3600,  # 8小时有效期
        httponly=True,
        secure=True,
        samesite="Lax"
    )
    return response
2、Dockfile
FROM python:3.9-slim

WORKDIR /app

COPY requirements.txt .
RUN pip install --no-cache-dir -r requirements.txt

COPY ./app /app

CMD ["uvicorn", "main:app", "--host", "0.0.0.0", "--port", "8899"]
3、requirements.txt
fastapi>=0.68.0
uvicorn>=0.15.0
requests>=2.26.0
python-dotenv>=0.19.0
4、构建认证服务镜像
cd wechat-auth-service
docker build -t wechat-auth-service:1.0 .
6.3. Seafile Docker 对接配置
1、修改 Seafile 的 docker-compose.yml
services:
  # ...原有服务...
  auth-service:
    image: wechat-auth-service:1.0
    container_name: wechat-auth
    environment:
      - WECHAT_CORP_ID=$WORK_WEIXIN_CORP_ID
      - WECHAT_APP_SECRET=$WORK_WEIXIN_AGENT_SECRET
      - WECHAT_AGENT_ID=$WORK_WEIXIN_AGENT_ID
      - SEAFILE_REDIRECT_URL=https://www.xxx.xom
    restart: unless-stopped
    networks:
      - seafile-net
...
2、配置 Nginx(关键配置)
修改 seafile.nginx.conf
# -*- mode: nginx -*-
# Auto generated at 08/17/2024 16:13:51

# Required for only office document server
map $http_x_forwarded_proto $the_scheme {
  default $http_x_forwarded_proto;
  "" $scheme;
}

map $http_x_forwarded_host $the_host {
  default $http_x_forwarded_host;
  "" $host;
}

map $http_upgrade $proxy_connection {
  default upgrade;
  "" close;
}

server {
  listen 80;
  server_name www.xxx.com default_server;
  return 301 https://$host$request_uri;
}

server {
  listen 443 ssl;
  ssl_certificate      /shared/ssl/seafile.crt;
  ssl_certificate_key  /shared/ssl/seafile.key;
  ssl_ciphers ECDH+AESGCM:DH+AESGCM:ECDH+AES256:DH+AES256:ECDH+AES128:DH+AES:ECDH+3DES:DH+3DES:RSA+AESGCM:RSA+AES:RSA+3DES:!aNULL:!MD5:!DSS;

  server_name www.xxx.com;
  client_max_body_size 10m;

  ##############################################
  # 服务专用代理配置(优先级最高)
  ##############################################
  # 1. OnlyOffice 文档服务
  location /onlyofficeds/ {
    proxy_pass http://oods/;
    proxy_http_version 1.1;
    client_max_body_size 100M;
    proxy_read_timeout 3600s;
    proxy_connect_timeout 3600s;
    proxy_set_header Upgrade $http_upgrade;
    proxy_set_header Connection $proxy_connection;
    proxy_set_header X-Forwarded-Host $server_name/onlyofficeds;
    proxy_set_header X-Forwarded-Proto $the_scheme;
    proxy_set_header X-Forwarded-For $proxy_add_x_forwarded_for;
  }

  # 2. SeaDoc 文档服务
  location /sdoc-server/ {
    proxy_pass http://seadoc:80/;
    proxy_redirect off;
    proxy_set_header Host $host;
    proxy_set_header X-Real-IP $remote_addr;
    proxy_set_header X-Forwarded-For $proxy_add_x_forwarded_for;
    proxy_set_header X-Forwarded-Host $server_name;
    proxy_set_header X-Forwarded-Proto $scheme;
    client_max_body_size 100m;
  }

  # 3. 文件上传/下载服务
  location /seafhttp {
    rewrite ^/seafhttp(.*)$ $1 break;
    proxy_pass http://127.0.0.1:8082;
    proxy_set_header X-Forwarded-For $proxy_add_x_forwarded_for;
    client_max_body_size 0;
    proxy_connect_timeout 36000s;
    proxy_read_timeout 36000s;
    proxy_request_buffering off;
  }

  # 4. WebDAV 服务
  location /seafdav {
    proxy_pass http://127.0.0.1:8080;
    proxy_set_header Host $host;
    proxy_set_header X-Real-IP $remote_addr;
    proxy_set_header X-Forwarded-For $proxy_add_x_forwarded_for;
    proxy_set_header X-Forwarded-Host $server_name;
    proxy_set_header X-Forwarded-Proto $scheme;
    proxy_read_timeout 1200s;
    client_max_body_size 0;
  }

  # 5. WebSocket 服务
  location /socket.io {
    proxy_pass http://seadoc:80;
    proxy_http_version 1.1;
    proxy_set_header Upgrade $http_upgrade;
    proxy_set_header Connection 'upgrade';
    proxy_redirect off;
    proxy_set_header X-Real-IP $remote_addr;
    proxy_set_header X-Forwarded-For $proxy_add_x_forwarded_for;
    proxy_set_header Host $http_host;
    }

    # 6. 通知服务
    location /notification {
        proxy_pass http://notification-server:8083;
        proxy_set_header Connection "Upgrade";
        proxy_set_header Upgrade $http_upgrade;
        proxy_set_header Host $host;
        proxy_set_header X-Real-IP $remote_addr;
        proxy_set_header X-Forwarded-For $proxy_add_x_forwarded_for;
        proxy_set_header X-Forwarded-Proto $scheme;
    }

    ##############################################
    # 认证相关配置(次优先级)
    ##############################################
    # 1. 根路径强制认证
    location = / {
        if ($cookie_wechat_authed != "1") {
            set $corp_id "企业ID";
            set $agent_id "应用ID";
            set $redirect_uri "https://www.xxx.com/auth_callback";
            return 302 "https://open.work.weixin.qq.com/wwopen/sso/qrConnect?appid=$corp_id&agentid=$agent_id&redirect_uri=$redirect_uri&state=seafile";
        }

        proxy_pass http://127.0.0.1:8000;
        proxy_read_timeout 310s;
        proxy_set_header Host $http_host;
        proxy_set_header Forwarded "for=$remote_addr;proto=$scheme";
        proxy_set_header X-Forwarded-For $proxy_add_x_forwarded_for;
        proxy_set_header X-Forwarded-Proto $scheme;
        proxy_set_header X-Real-IP $remote_addr;
        proxy_set_header Connection "";
        proxy_http_version 1.1;
    }

    # 2. 其他需要认证的路径
    location ~ ^/(accounts/) {
        if ($cookie_wechat_authed != "1") {
            set $corp_id "企业ID";
            set $agent_id "应用ID";
            set $redirect_uri "https://www.xxx.xom/auth_callback";
            return 302 "https://open.work.weixin.qq.com/wwopen/sso/qrConnect?appid=$corp_id&agentid=$agent_id&redirect_uri=$redirect_uri&state=seafile";
        }

        proxy_pass http://127.0.0.1:8000;
        proxy_read_timeout 310s;
        proxy_set_header Host $http_host;
        proxy_set_header Forwarded "for=$remote_addr;proto=$scheme";
        proxy_set_header X-Forwarded-For $proxy_add_x_forwarded_for;
        proxy_set_header X-Forwarded-Proto $scheme;
        proxy_set_header X-Real-IP $remote_addr;
        proxy_set_header Connection "";
        proxy_http_version 1.1;
    }

    # 3. 认证回调接口
    location = /auth_callback {
        proxy_pass http://auth-service:8899;
        proxy_set_header Host $host;
        proxy_set_header X-Real-IP $remote_addr;
        proxy_set_header X-Forwarded-For $proxy_add_x_forwarded_for;
        proxy_set_header X-Forwarded-Proto $scheme;
    }

    ##############################################
    # 静态资源放行(优先级高于通用代理)
    ##############################################
    location ~ ^/(static|media|WW_verify) {
        proxy_pass http://127.0.0.1:8000;
        proxy_set_header Host $host;
        proxy_set_header X-Real-IP $remote_addr;
        proxy_set_header X-Forwarded-For $proxy_add_x_forwarded_for;
        proxy_set_header X-Forwarded-Proto $scheme;
    }

    ##############################################
    # 默认代理规则(最低优先级)
    ##############################################
    location / {
        proxy_pass http://127.0.0.1:8000;
        proxy_read_timeout 310s;
        proxy_set_header Host $http_host;
        proxy_set_header Forwarded "for=$remote_addr;proto=$scheme";
        proxy_set_header X-Forwarded-For $proxy_add_x_forwarded_for;
        proxy_set_header X-Forwarded-Proto $scheme;
        proxy_set_header X-Real-IP $remote_addr;
        proxy_set_header Connection "";
        proxy_http_version 1.1;
    }
}
添加评论